The display color management is a crucial feature for anyone working with colors in Adobe Premiere Pro CC 2019. It allows you to activate color profiles directly in the program without having to change global settings of your operating system. This gives you the opportunity to represent colors more accurately and optimize the results for your projects. In this guide, I will not only introduce you to the basics of display color management, but I will also explain step by step how to activate it in Adobe Premiere Pro.
Main insights
The display color management is now directly integrated into Premiere Pro 2019, making color management faster and more effective. Using a calibrated monitor and an appropriate graphics card is a prerequisite. Color management can now be controlled selectively and no longer globally via the operating system.
Step-by-Step Guide
What is display color management?
Before we go into detail, it is important to understand what display color management means. It is a system that ensures that the colors you see in your editing are represented as accurately as possible on different devices. This allows you to ensure that your color grading and corrections in Premiere Pro look the way you want them to.

Prerequisites for use
To use display color management in Premiere Pro, you need special hardware. You should use a monitor that is capable of displaying different color values, as well as an appropriate graphics card that is compatible with your system. Only under these conditions can you truly take advantage of display color management.
Advantages of display color management
Display color management allows you to see the result of your color corrections directly in the viewport or on an external monitor. This is especially useful when you are working your menus on a standard monitor and directing the output for color correction to a calibrated device.
Activating display color management
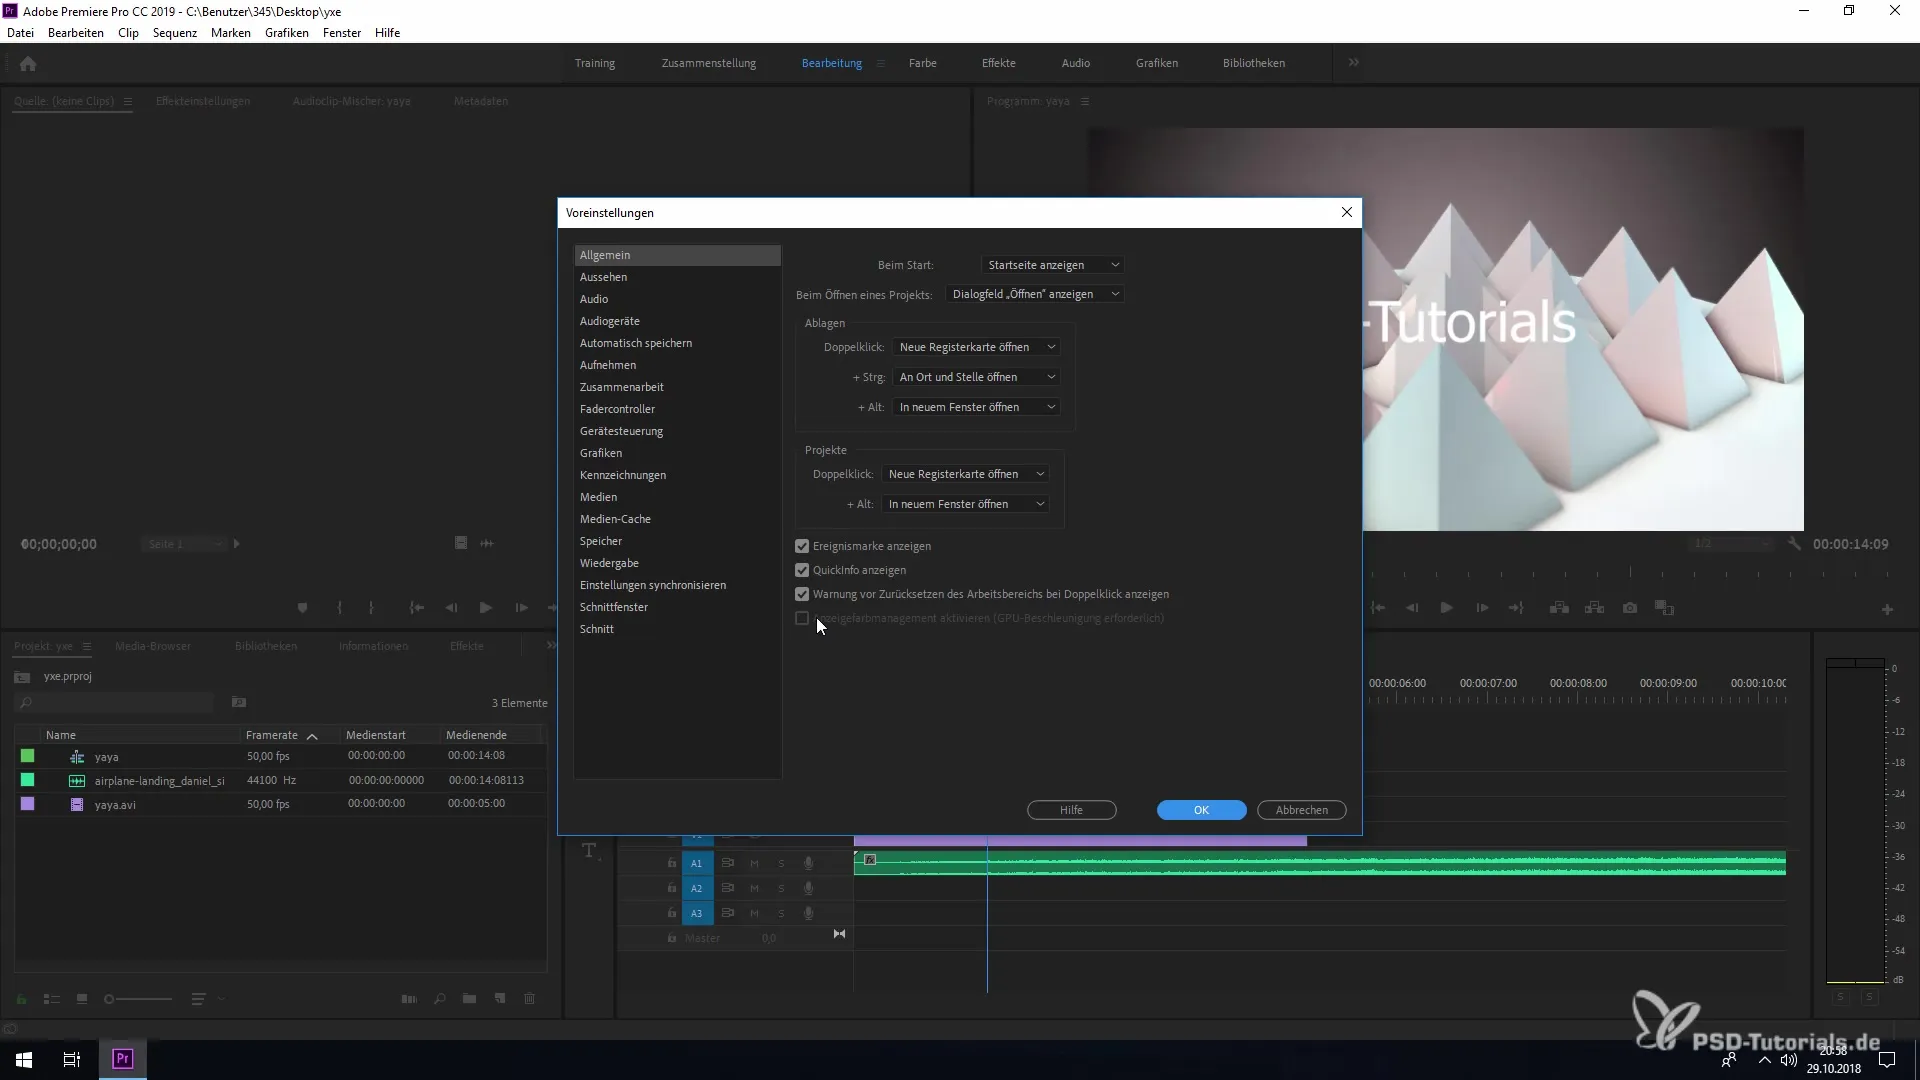
To activate display color management, go to the preferences in Adobe Premiere Pro. Click on "Edit," then "Preferences," and select "General." Here you will find an option for display color management. Check the corresponding box to activate it.
Application of color management
After you have activated display color management, Premiere Pro will allow you to manage color profiles directly in the editing environment. This provides the user the flexibility to see color changes in real-time and ensure that everything looks true to color.

Summary – Display Color Management in Premiere Pro CC 2019
This guide has explained how to activate display color management in Adobe Premiere Pro CC 2019. By properly setting up your color management, you can reduce color errors and deliver better results. Use this step-by-step guide to ensure that your projects are edited with the highest color accuracy.
Frequently Asked Questions
What is display color management in Premiere Pro?Display color management ensures that colors in Premiere Pro are accurately represented and allows for the direct management of color profiles within the program.
What hardware do I need for display color management?You need a suitable monitor that can display various color values, as well as an appropriate graphics card.
Where can I find the settings for display color management in Premiere Pro?You can find the settings under "Edit" > "Preferences" > "General".
How do you activate display color management?Check the corresponding option in the "General" area of the preferences.
Why is color management important?Color management is essential to ensure that the colors you see in your editing are represented as accurately as possible on various devices.


