Adobe Premiere Pro CC 7.1 brings some essential improvements in the multicam-workflow that allow you to edit your projects even more efficiently. With these new features, you can create, edit, and customize your multicam sequences more easily. In this guide, I will show you step by step how to take advantage of the new features to optimally benefit from the improvements.
Key Insights
- Creation of multicam sequences simplified
- New options for scaling and adjusting clips
- Color adjustments directly during editing possible
- Flexible adjustment of camera order and settings
- Disabling camera angles for simplified editing
Step-by-step guide
Create a multicam sequence
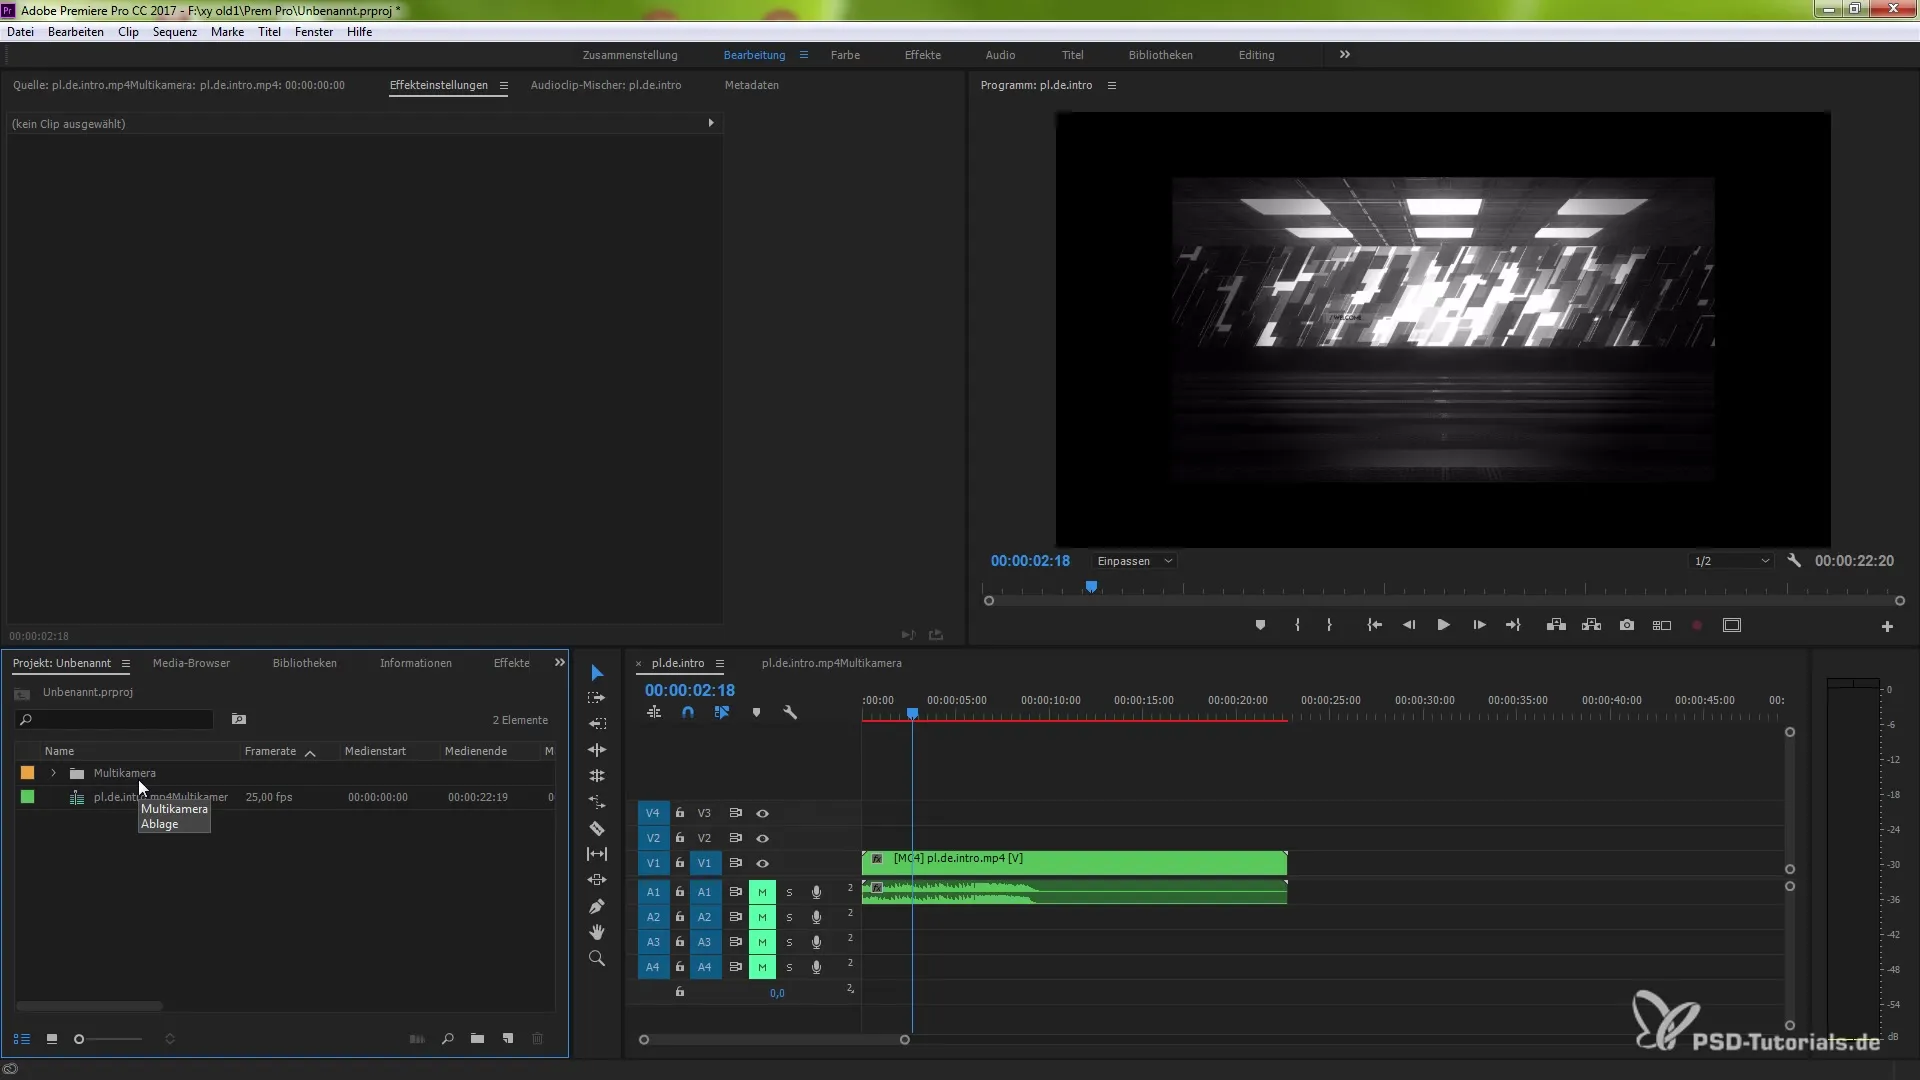
First, you need a multicam sequence to effectively utilize the new features. To create a new multicam sequence, select the desired clips in the project panel. Then, right-click and choose “Create Multicam Sequence.” After creation, you can easily drag and drop the sequence into the timeline and have immediate access to the new features.
Edit and scale clips
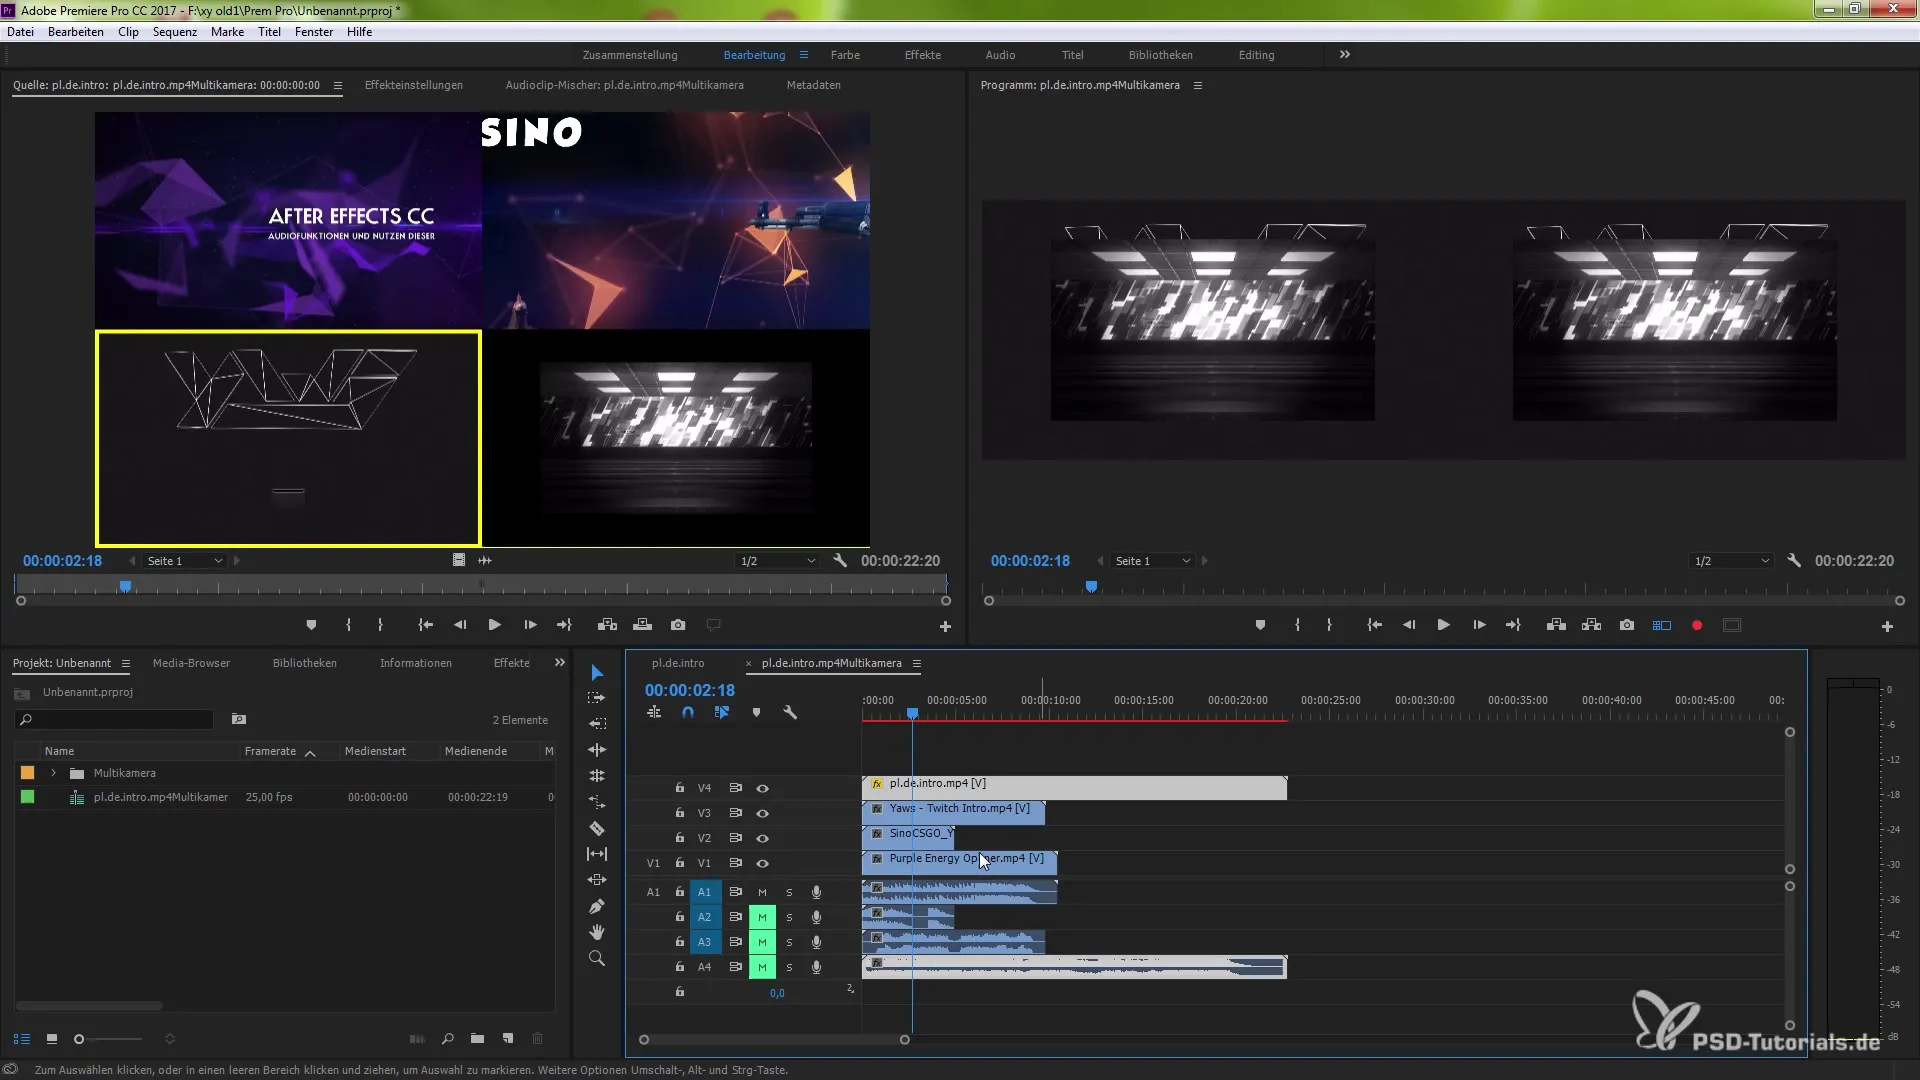
If you find that some clips in your multicam sequence are too small, there's an easy solution. Hold down the control key (Ctrl) or the command key (Mac) and double-click on the relevant clip. This will take you to the clip's settings, where you can set the scaling to 100%. This ensures that all clips are displayed at the correct size.
Apply color changes
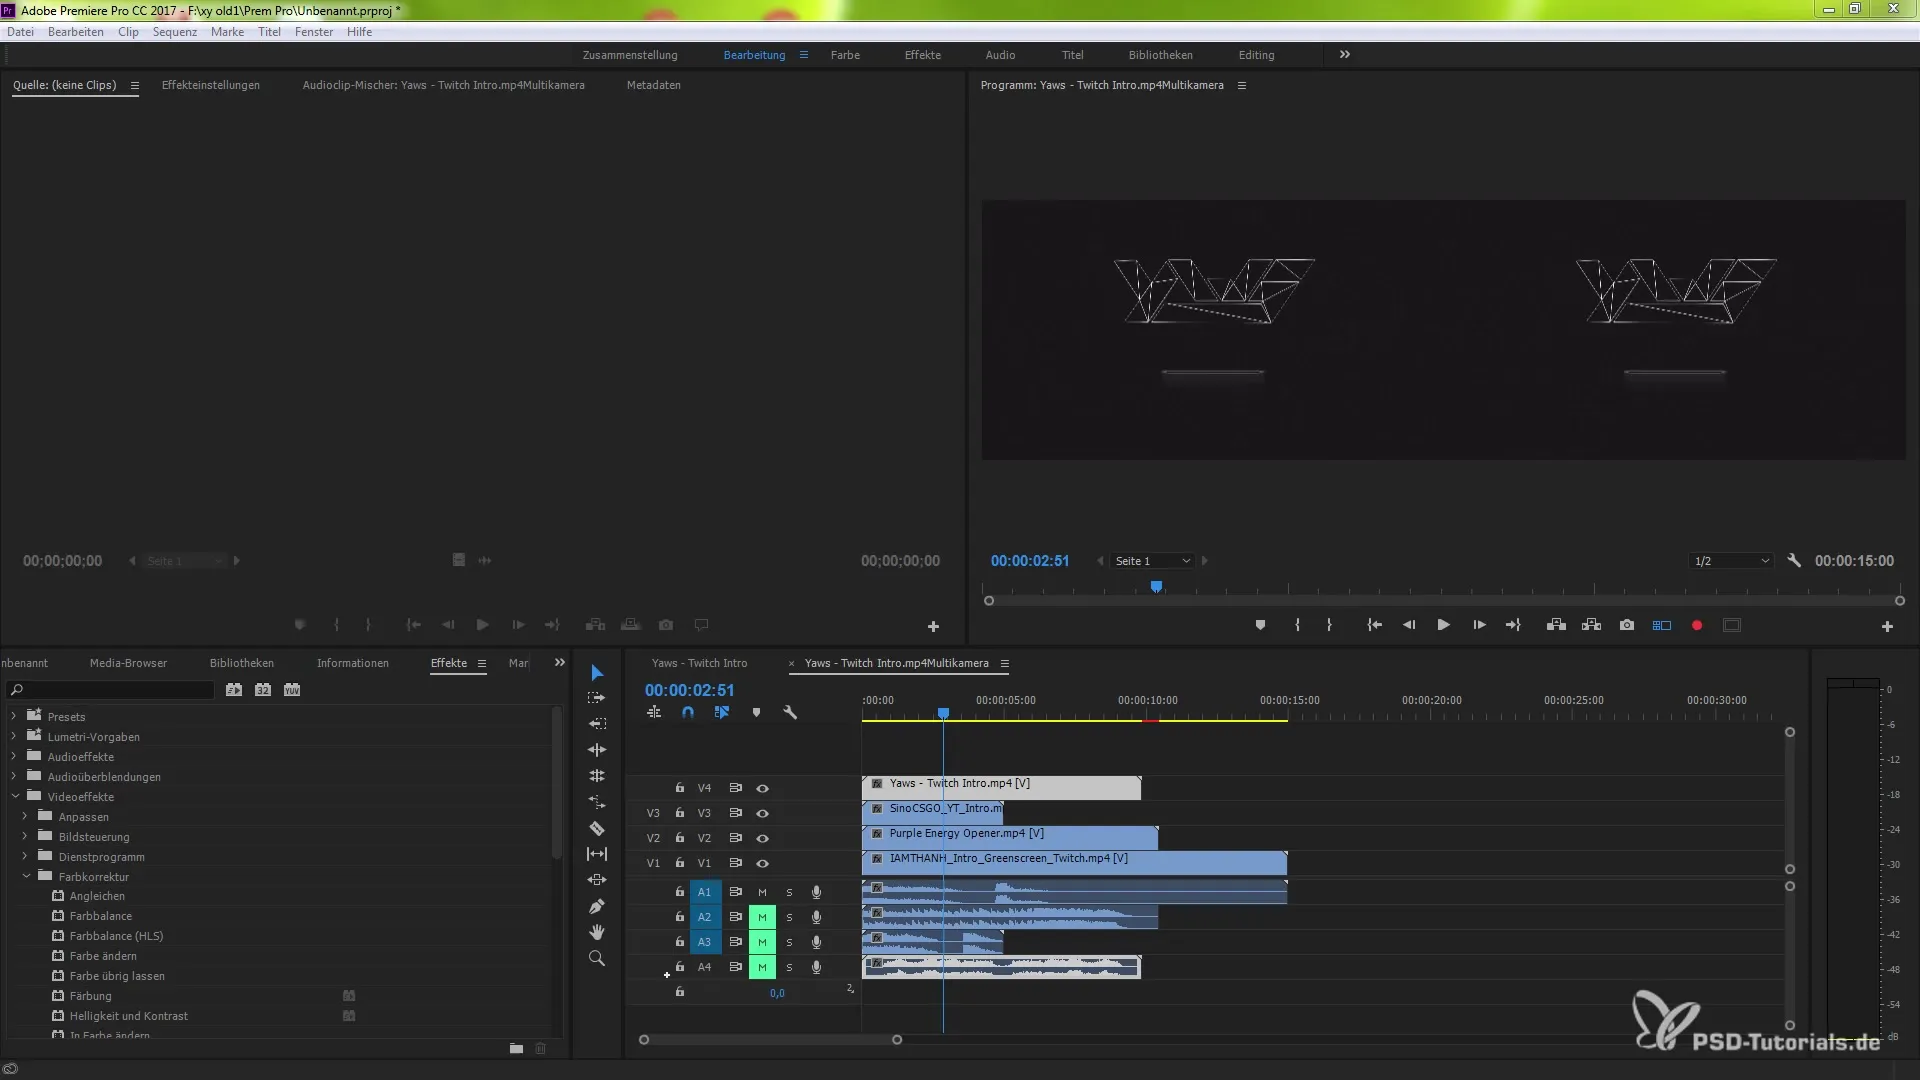
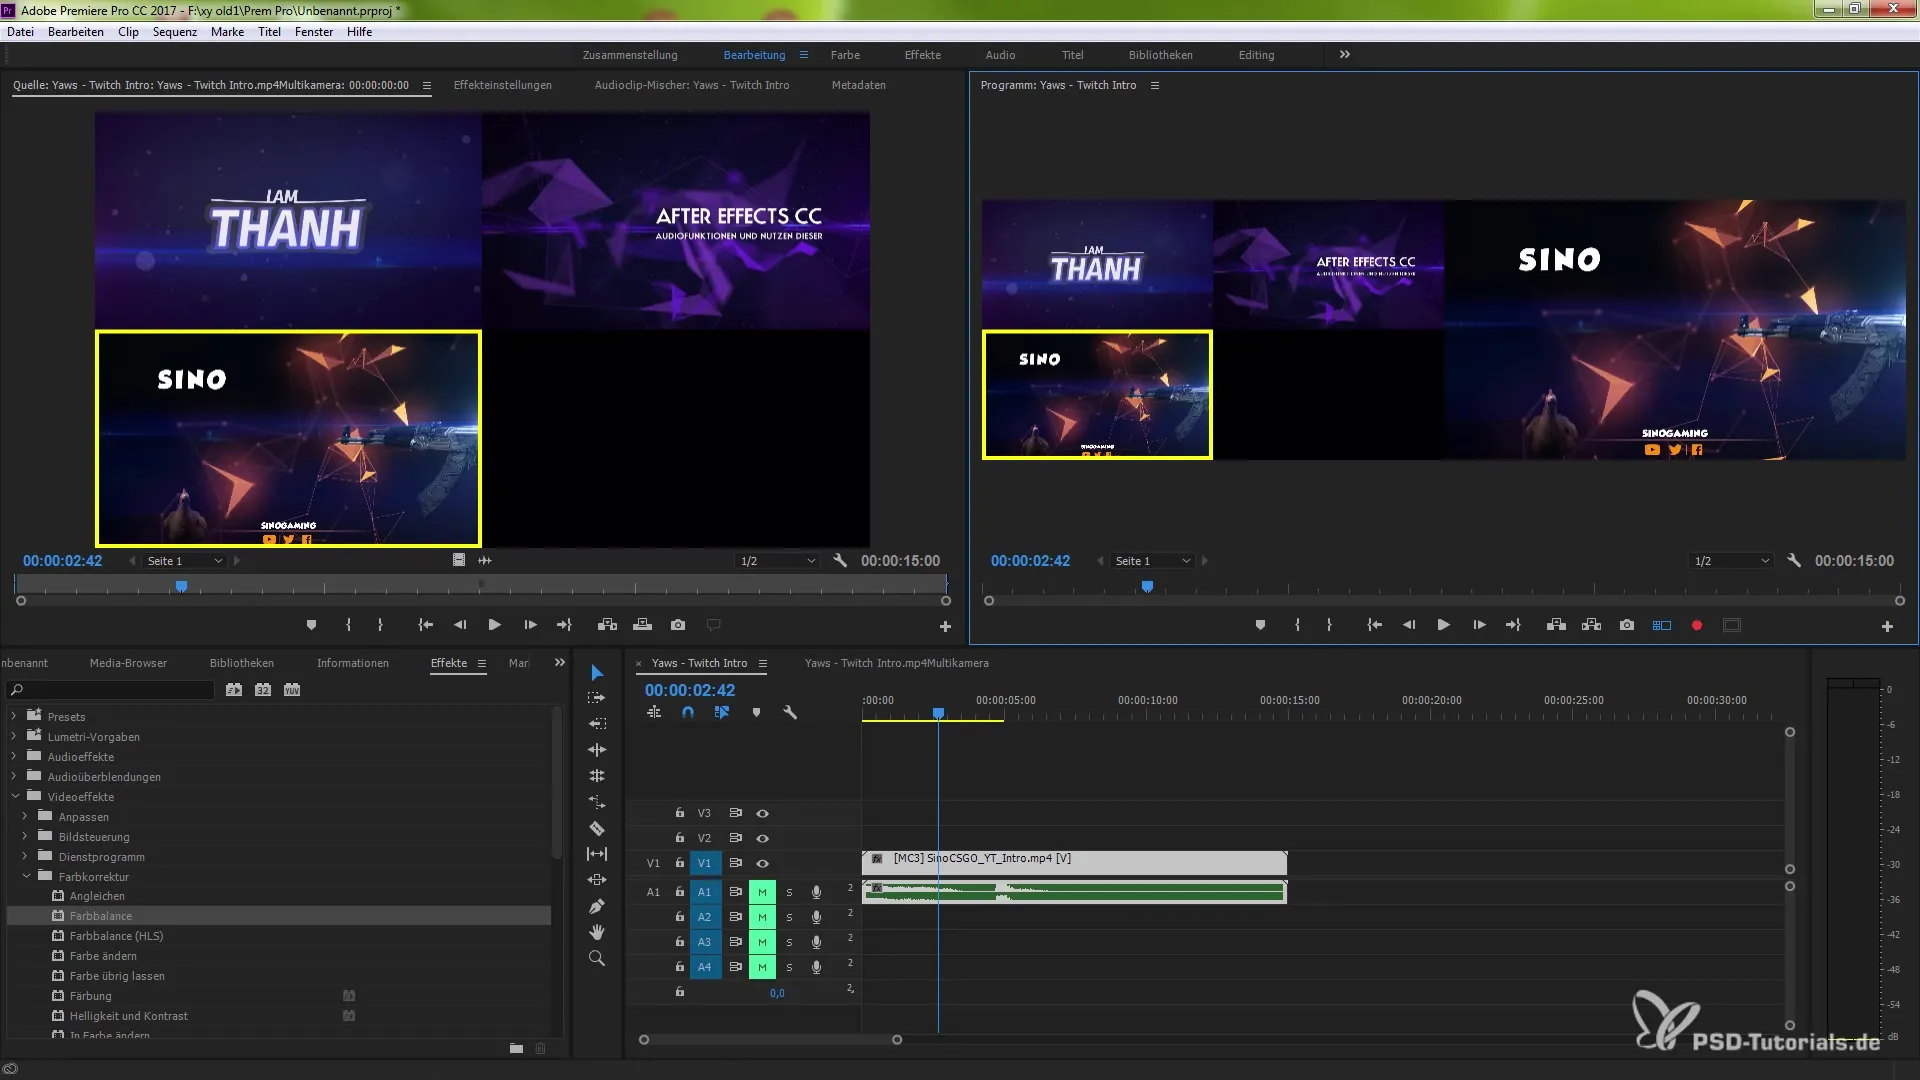
Another helpful feature is the ability to adjust clip colors while editing. Select the clip you want to change, go to “Effects,” and search for the “Color Correction” effect. Drag this onto your clip to make new color changes in the effects settings. This allows you to adjust the clip to fit the desired aesthetics of your project while continuing to work with the multicam option.
Adjust camera order
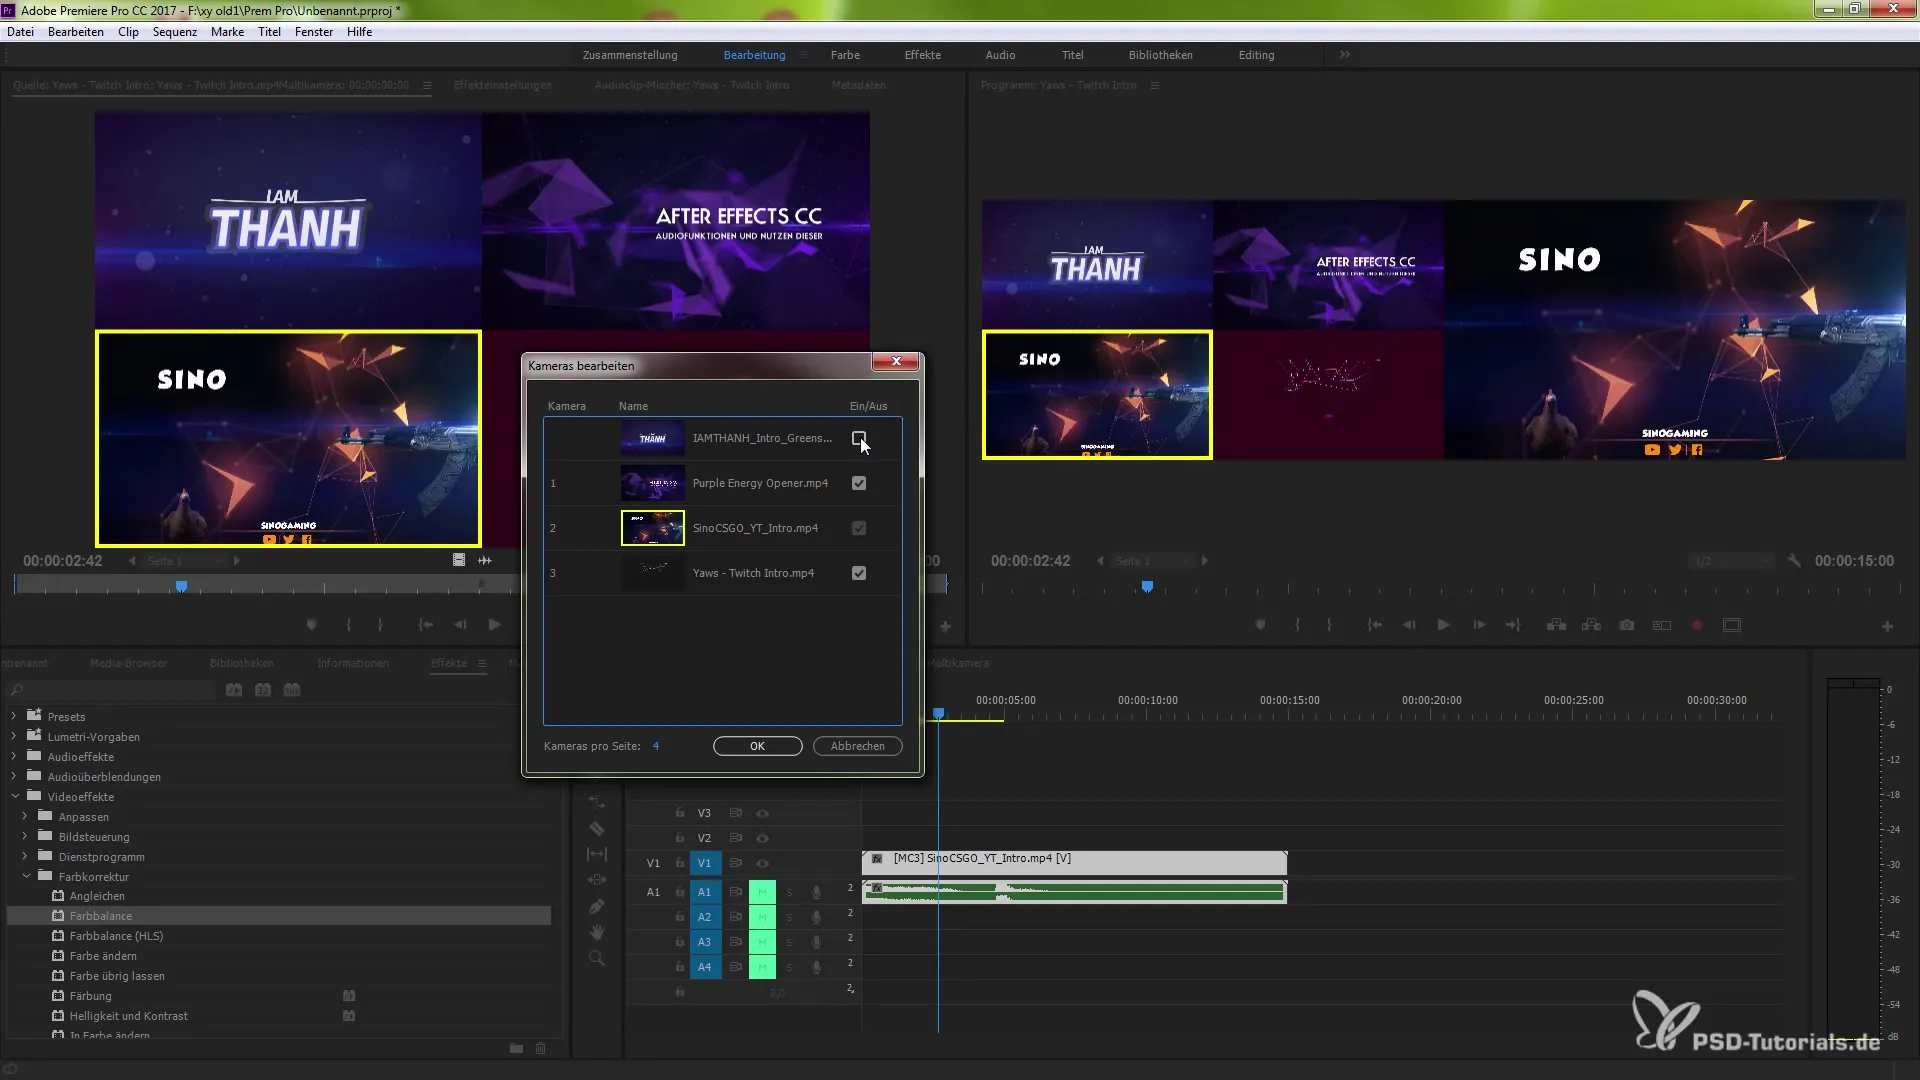
If you want to change the order of cameras in your multicam sequence, simply go to the settings and click on “Edit Cameras.” Here, you can rearrange the order using drag-and-drop. Confirm your changes, and you will see that the new order is updated in both the source monitor and the program monitor.
Disable camera angles
There may be situations where not all camera angles are required for every cut. If you decide to disable certain camera angles so they are no longer selectable, simply go to the clip you want to disable and right-click. This still allows you to save space in the interface and simplify editing.
Activate overlays
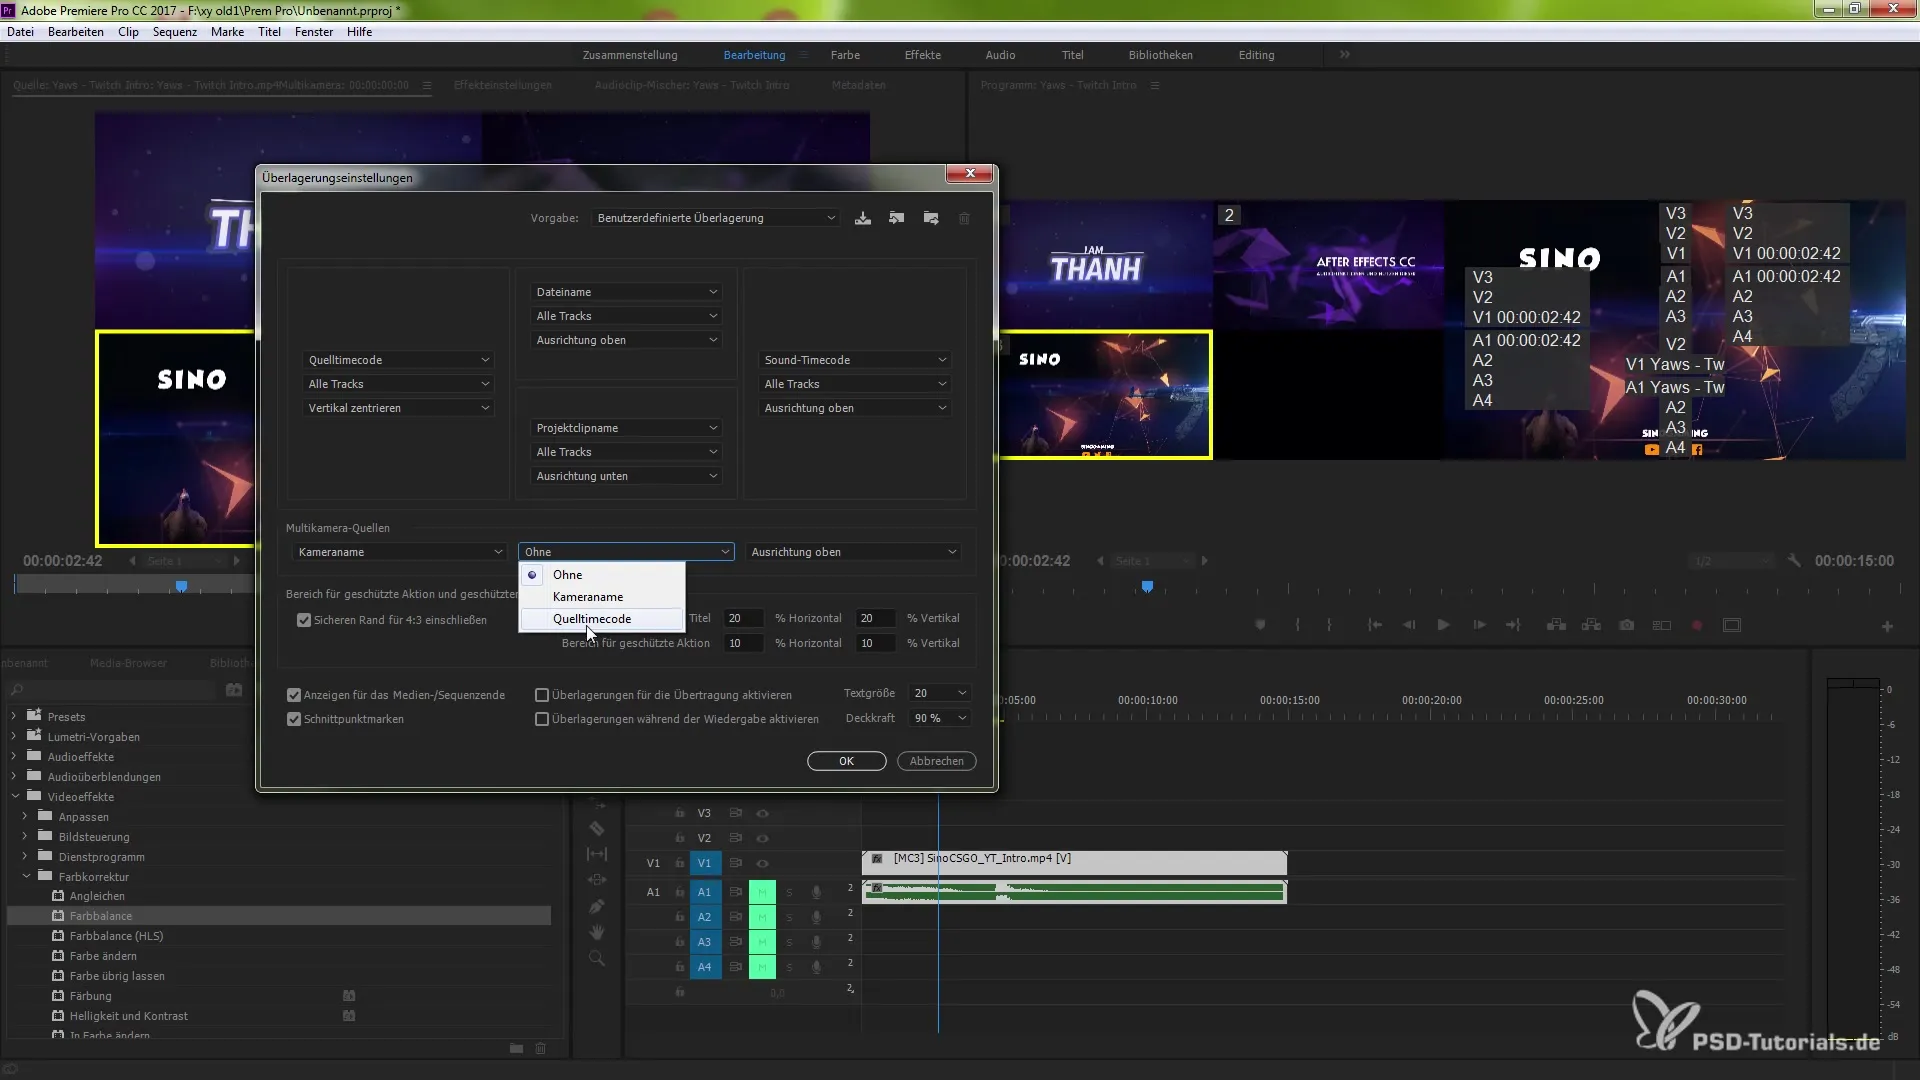
The overlay features in Premiere Pro are a great way to display additional information. You can navigate to the overlay settings to specifically enable the multicam sources. Here, you can add the camera name, timecode, and other relevant information to enhance readability during editing.
Summary – Improved multicam workflow in Premiere Pro CC 7.1
With the new features of Premiere Pro CC 7.1, you can significantly enhance your multicam workflow. This guide has shown you how to create a multicam sequence, scale clips, apply color changes, and adjust the camera order. Use these new features to make your projects even more professional.
Frequently Asked Questions
How do I create a multicam sequence?Select the clips in the project panel, right-click, and choose “Create Multicam Sequence.”
How can I adjust the size of a clip?Double-click on the clip while holding down the control key (Ctrl) or command key (Mac) and set the scaling to 100%.
Can I change the colors of clips during editing?Yes, use the color correction effect from the video effects and drag it onto the clip.
How do I change the order of the cameras?Go to the camera settings, click on “Edit Cameras,” and drag the cameras into the desired order.
Can I disable camera angles?Yes, right-click on the clip you want to disable.
How do I activate overlays in Premiere Pro?Go to the overlay settings and enable the desired multicam sources.


