Adobe Premiere Pro CC 7.0 comes with a variety of new features that can significantly enhance your editing experience. Unlike previous versions, not only has the user interface been updated, but also the technical capabilities to ensure a sharper and clearer display. In this guide, you will learn how to make use of the high-resolution display in Premiere Pro and what advantages it offers you.
Key Insights
- Premiere Pro CC 7.0 supports high-resolution displays, including Retina displays and UHD displays.
- The software allows for better content representation, especially at high pixel density.
- There is a clear distinction between different resolutions and their impact on display.
Step-by-Step Guide
Step 1: Familiarize Yourself with the Interface
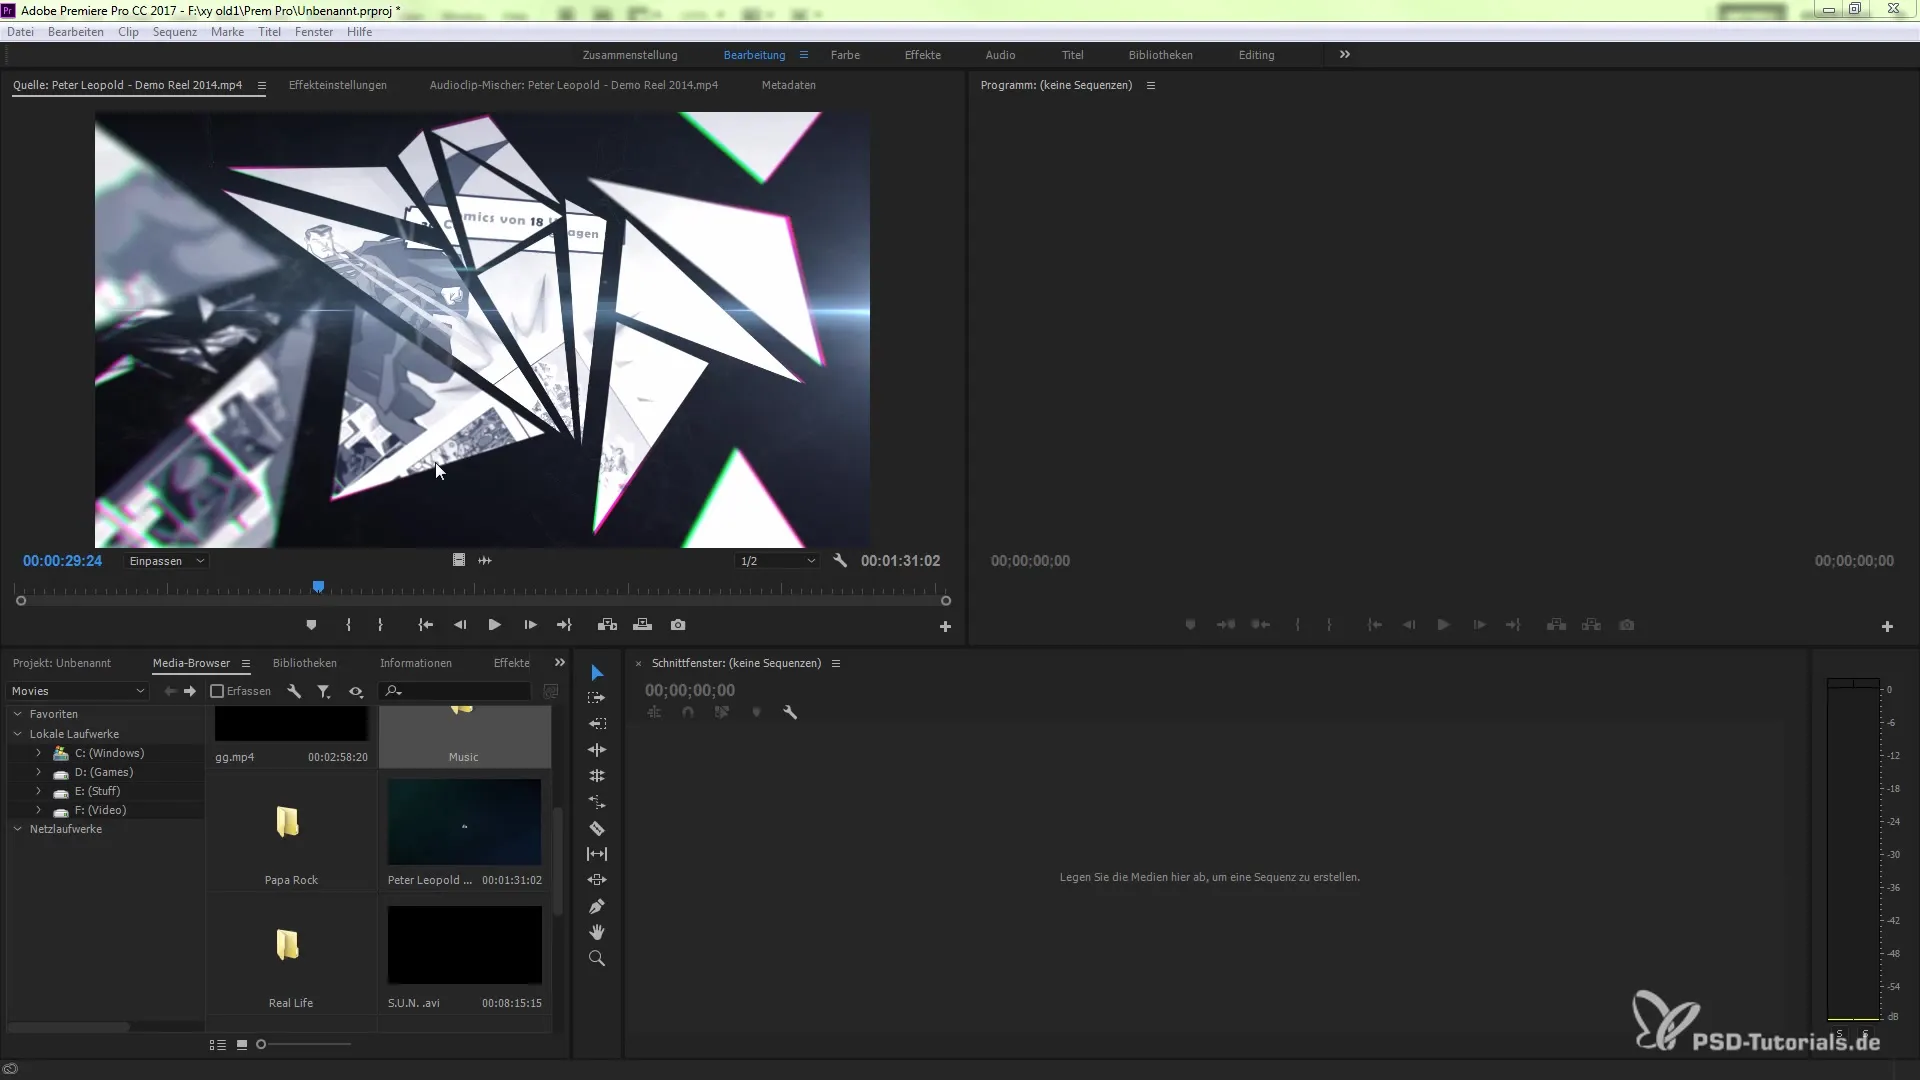
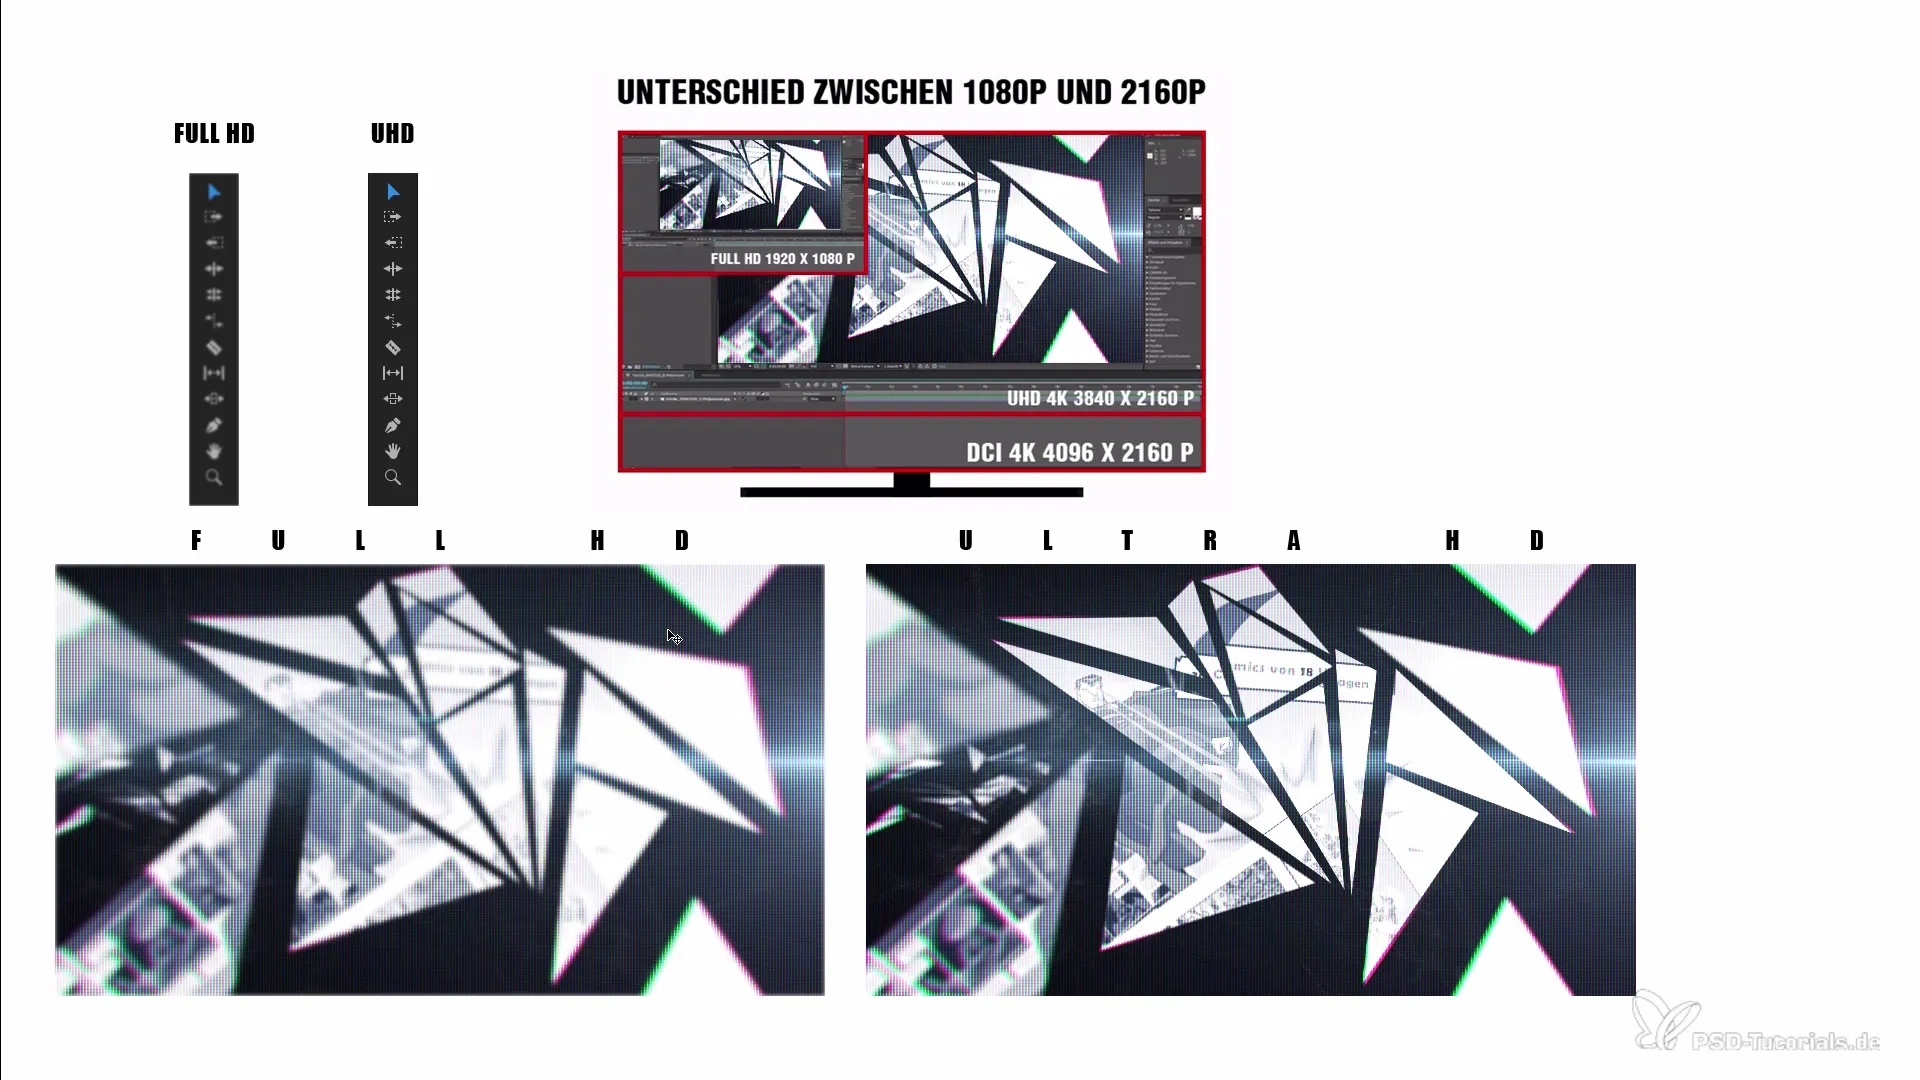
To fully understand the changes in the user interface of Adobe Premiere Pro CC 7.0, you should take a look at the updated interface. You will notice that some elements present themselves in a less sharp display, especially when working in Full HD. The new high-resolution display ensures that the user interface looks clearer when working with UHD displays or Retina displays.

Step 2: The Benefits of High-Resolution Display
A key feature of Premiere Pro CC is the ability to display high-resolution content. This means that while using Full HD resolutions, you can switch to UHD or even 4K. This option allows you to utilize the sharpened display format of elements in Premiere, so you no longer get a pixelated view during editing. This is particularly advantageous when you want to edit precise details.
Step 3: Experiment with Resolution Settings
To recognize the difference between various resolutions, you can conduct some tests yourself. Zoom into the user interface and examine the display of individual elements. In Full HD, elements may appear pixelated, while the same view in UHD is displayed clearly in sharp quality. Make sure to use the right display for your needs to enjoy the full benefits of the new software.

Step 4: Technical Requirements and Settings
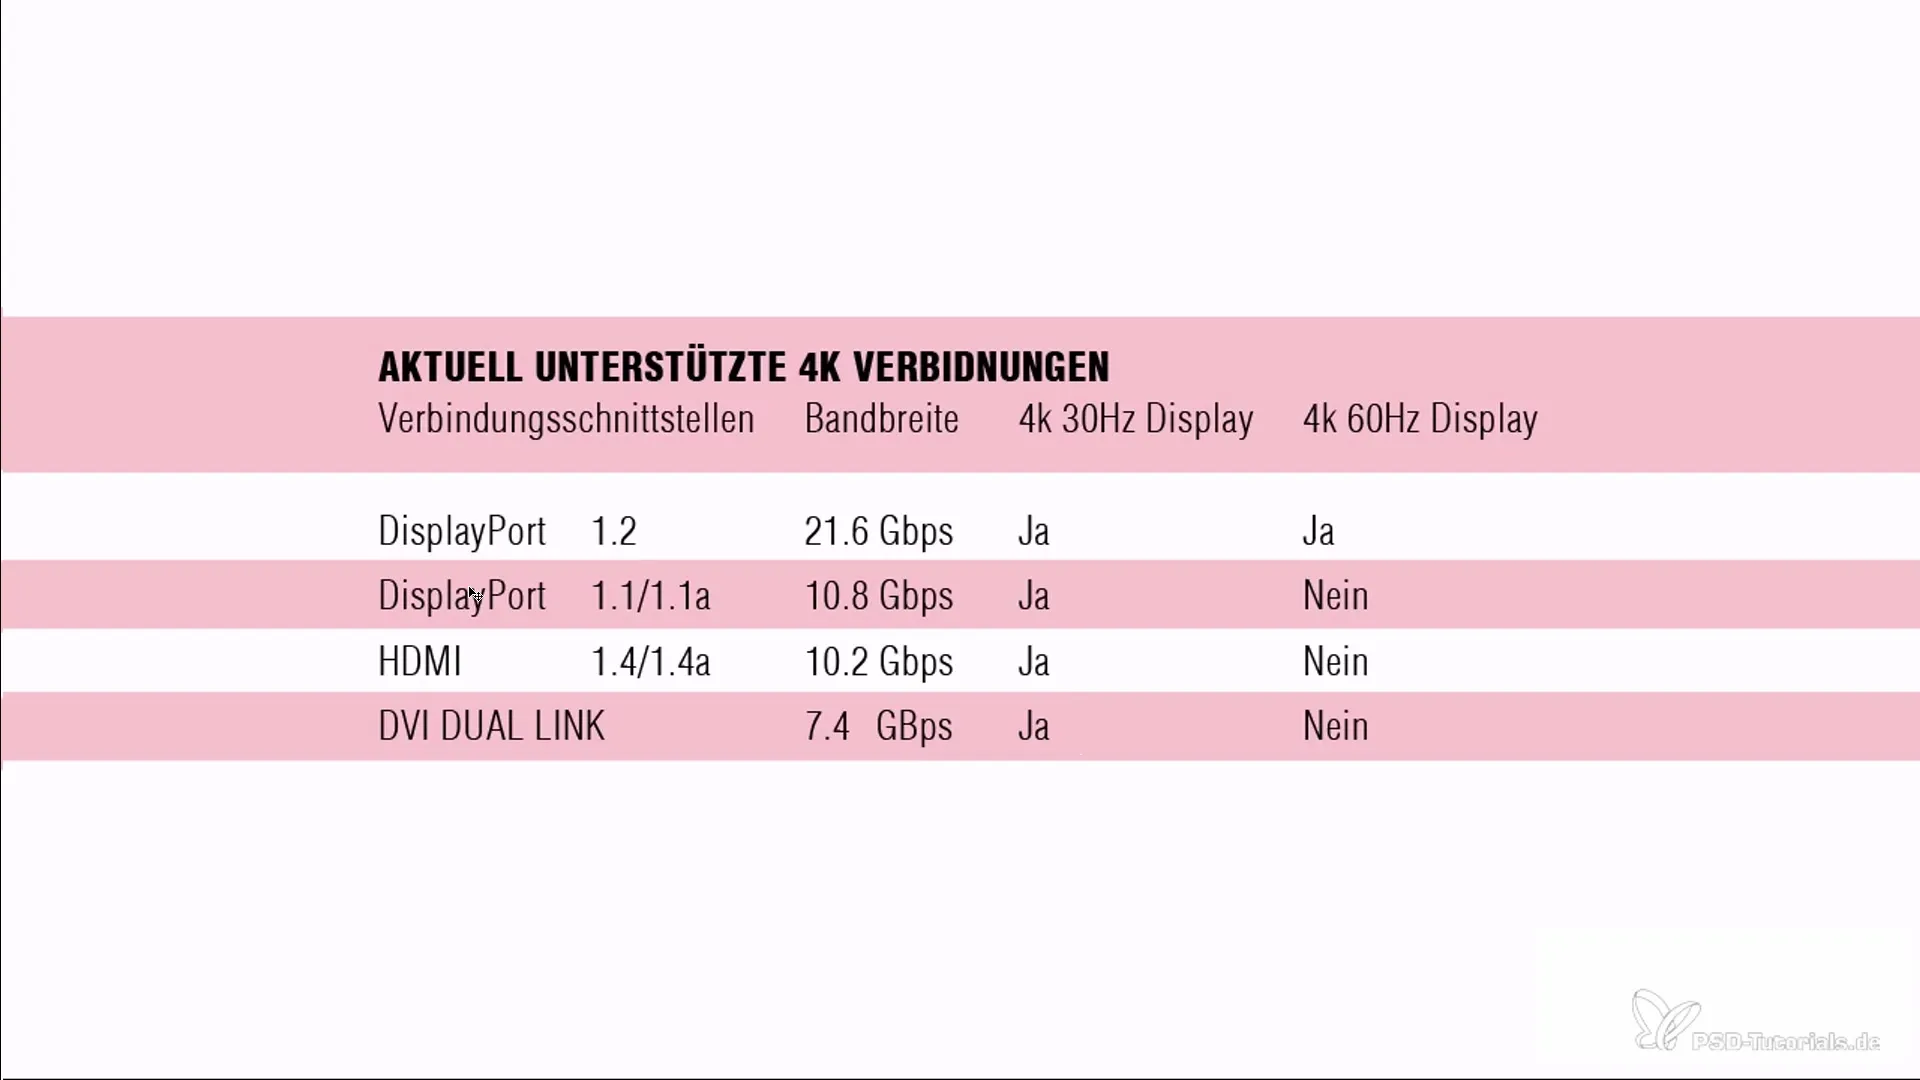
Also familiarize yourself with the supported connections for 4K displays. The most common interfaces include DisplayPort, HDMI, and DVI. For 4K displays, you need at least DisplayPort 1.2 to achieve a frame rate of 60 Hz. A standard DVI cable can only provide a maximum frame rate of 30 Hz, which could limit you during editing.

Step 5: Test Resolution in Practice
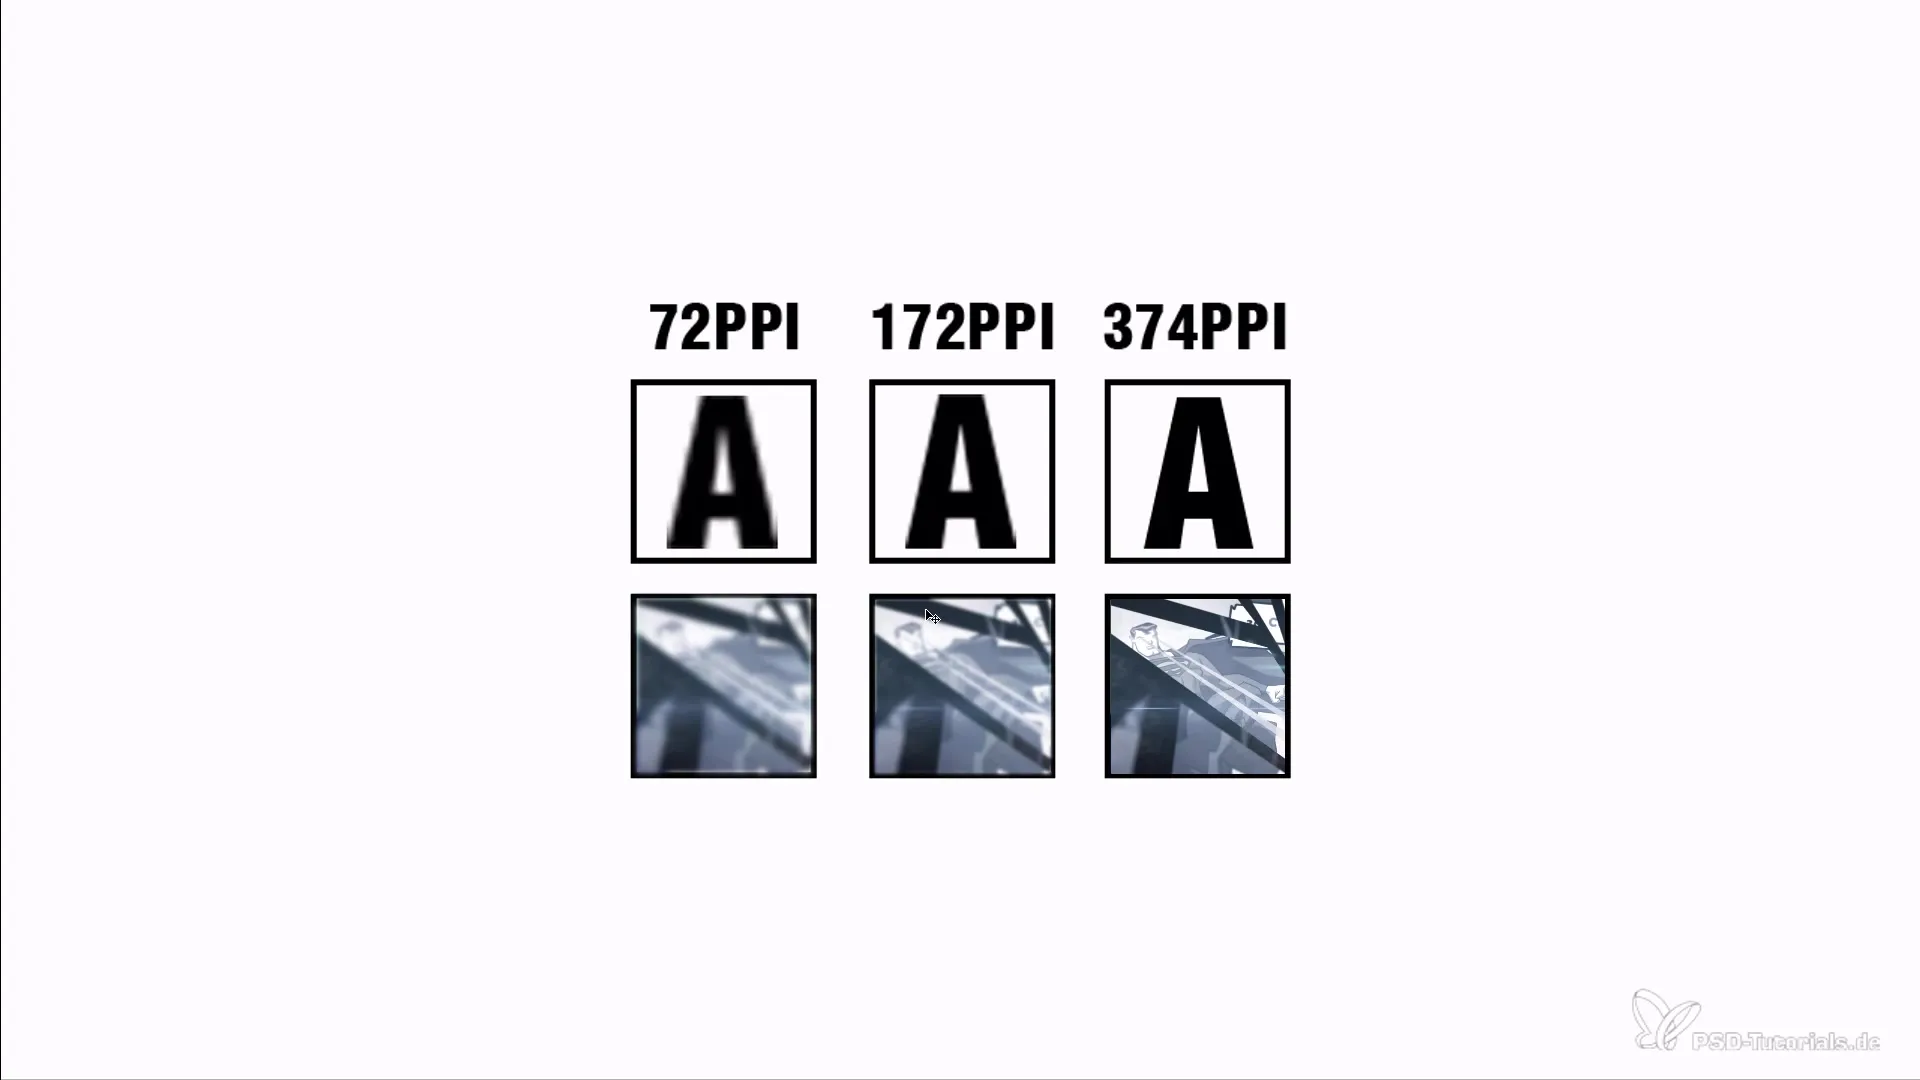
To experience the difference between 72 ppi and higher ppi values, you can perform a direct comparison. Reduce the resolution and observe how the image quality changes. For example, an image at 172 ppi already looks much sharper. Utilize this knowledge to choose and use your displays optimally.

Summary – High-Resolution Display and Enhanced Usability in Premiere Pro CC 7.0
The introduction of high-resolution display options in Adobe Premiere Pro CC 7.0 brings a significant improvement to the user experience. By using UHD displays or Retina displays, the representation of the user interface is greatly enriched. You get sharp, clearly distinguishable elements that make editing more efficient and enjoyable. Additionally, it is important to know the devices used and their specifications to fully capitalize on the software's benefits.
Frequently Asked Questions
What is the main feature of Premiere Pro CC 7.0?Premiere Pro CC 7.0 offers a high-resolution display that opens new possibilities in editing.
How can I activate the high-resolution display?You can activate the high-resolution display by going into the settings and configuring the display method of your graphics card accordingly.
What resolutions does Premiere Pro CC 7.0 support?Premiere Pro supports multiple resolutions, including Full HD, UHD, and 4K.
What are the requirements for 4K displays?You need at least DisplayPort 1.2 for a frame rate of 60 Hz for 4K displays.
How can I see the changes in the user interface?You can recognize the changes by activating the high-resolution display and closely examining the windows in the software.


