
Imagine you place two layers on top of each other and the upper one affects the lower one so that a completely new look emerges. That is exactly what layer blend modes do. They determine how a layer combines with the layers beneath it. In this tutorial, you will learn the most important basics in Affinity Photo: from opacity through the different blend mode categories to special cases such as Difference or Erase. You can follow all the steps directly on your own image.
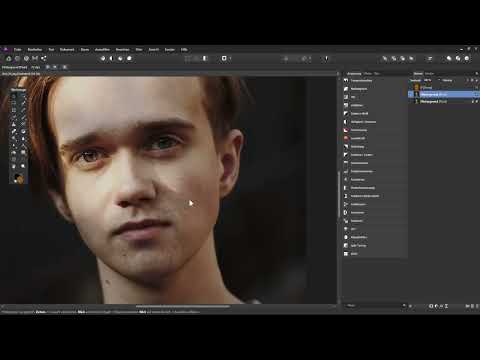
The video is only loaded from YouTube when you play it – data (including your IP address) is then transmitted to YouTube/Google. More in the privacy policy
Key Takeaways
- Layer blend modes determine how a layer is combined with the layers beneath it.
- With opacity, you control how strongly the effect is visible.
- The blend modes are organized into groups: darkening, lightening, and contrast-enhancing.
- The Difference mode is excellent for making differences between images visible.
- With adjustment layers and the Luminosity mode, you change only the brightness, not the colors.
Step 1: Create a Fill Layer and Adjust the Color
For the demonstration, you need a new fill layer. In the "Layer" menu, select the entry "New Fill Layer". It appears at the very top of the Layers panel and is white by default. Since white is not very interesting for our purposes, choose a different color via the button, for example a somewhat darker shade of orange.


Step 2: Understand Opacity
You can find the opacity of the active layer at the top of the Layers panel. By default, it is set to 100 percent. If you click on the menu, a slider appears. If you drag it to the left, the layer gradually becomes more transparent until it is practically invisible at 0 percent. At 50 percent, you can see your original image showing through, because both layers are blended half and half.
It is quicker if you click directly on the label "Opacity", hold down the left mouse button, and move the mouse to the left or right. Afterwards, set the opacity back to 100 percent.


Step 3: Open the Layer Blend Modes Menu
To the right of the opacity lies the real heart of this tutorial. If you click in there, you will see the layer blend modes. "Normal" is selected by default, which means that the layer does not blend with the layers beneath it as long as you do not reduce the opacity. Below that, you will find the actual blend modes, which are organized into several categories.
If you move the mouse over an entry, you immediately see a live preview. This way, you can try out every mode without committing to it right away.
Step 4: Use Darkening Blend Modes
The first group darkens the layers beneath it. The best-known and most popular representative is "Multiply". Here, pure black is fully transferred, pure white not at all, and the midtones are blended with each other. The counterpart to this is "Screen", which deliberately lightens the layers beneath. Overall, modes such as Darken, Multiply, and Color Burn belong to this group.

Step 5: Apply Lightening Blend Modes
The lightening modes work exactly the other way around. As the name suggests, the layers beneath become brighter. "Screen" is particularly popular here. "Dodge" and "Add" also deliver interesting results. Try out the modes on your own image, because their effect depends strongly on the subject.

Step 6: Use Contrast-Enhancing Blend Modes
The contrast-enhancing modes are the third group. They darken and lighten at the same time, which increases the contrast. This category includes, among others, "Overlay", "Soft Light", "Hard Light", "Vivid Light", "Pin Light", and "Linear Light".
"Soft Light" has proven particularly effective. The result looks subtle, the colors become nicely saturated, and the contrast increases noticeably, but not excessively. "Overlay" turns out similar, but is a bit softer still. "Hard Mix", on the other hand, looks very stylized and is better suited for artistic effects. If a mode is too strong for you, simply reduce the opacity of the layer or the saturation of the fill. This quickly gives you a warmer, more pleasant look.

Step 7: Understanding the Difference Mode
The "Difference" mode holds a special position. It shows the differences between layers. If two identical images are placed exactly on top of each other, the result is a completely black image. This can be put to practical use, for example to check retouching.
To do this, first duplicate the background layer by clicking on it and creating a copy with "Ctrl + J". If you then set the upper layer to "Difference", you will see a black image. Afterwards, you can retouch the image, for example with the Inpainting Brush Tool. Then set the edited layer to "Difference", and the retouched areas will appear in altered colors. This way you can see exactly where changes were made.


Step 8: Distinguishing Hue, Saturation, Luminosity, and Color
Another group specifically controls color information. The "Hue" mode transfers only the hue of the active layer to the layers below. "Saturation" transfers the degree of saturation, while "Color" transfers hue and saturation together. Since our fill is already highly saturated, the result is correspondingly vivid.
The "Luminosity" mode is particularly interesting. It transfers only the brightness information. This mode unfolds its full effect especially in combination with adjustment layers.

Step 9: Combining Adjustment Layers with the Luminosity Mode
To demonstrate this, hide the fill layer and open the menu for adjustment layers. Choose, for example, "Levels" there. This can significantly increase the contrast. However, the saturation often rises as well, which quickly becomes noticeable in the background or in the hair.
If you only want to change the brightness, set the blend mode of the adjustment layer to "Luminosity". The contrast increase then affects only the brightness information, and the colors remain untouched.


Step 10: Using the Erase Mode
The "Erase" mode is located at the very bottom of the list and is a real special case. As a test, draw an ellipse in the image or paint with the Brush Tool on a pixel layer. If you then set this layer to "Erase" mode, the areas there appear transparent. No matter how many layers are underneath, they become see-through. This can be very helpful for compositing and cutouts.

Step 11: Using Layer Blend Ranges for Targeted Effects
Finally, there are the layer blend ranges. You open them via the gear icon on the active layer. For this tutorial, the fill layer is shown again in "Normal" mode. With the anchor points, you can specifically bring back light or dark areas of the photo underneath, even though the fill layer actually covers it. If you drag the anchor point for the dark areas downward, they become visible. With the reset, you undo everything again.


Summary ??? Layer Blend Modes in Affinity Photo: A Beginner's Guide
Layer blend modes are a versatile tool in Affinity Photo. You have learned how to control the strength of an effect with opacity and how the blend modes are organized into darkening, lightening, and contrast-enhancing groups. You are also familiar with special cases such as Difference, Luminosity, and Erase, as well as the layer blend ranges. The best way to learn the modes is to simply try them out and use the live preview.
FAQ
What is a layer blend mode?A layer blend mode determines how a layer is combined with the layers beneath it.
How do I set the opacity of a layer?In the Layers panel, click on the opacity menu and drag the slider, or click directly on the label and move the mouse while holding down the left mouse button.
Which blend mode is the most popular?Multiply is considered the best-known and most frequently used mode. It darkens the layers beneath it.
What is the Difference mode suitable for?Difference shows differences between layers. Identical layers result in a black image, so retouching or deviations can be easily recognized.
What does the Luminosity mode do with adjustment layers?Luminosity transfers only the brightness information. A contrast increase then does not additionally change the colors.
What does the Erase mode do?Erase makes the layers beneath transparent in the area of the active layer, regardless of how many layers are underneath.


